How To Customise Heading Fonts In Squarespace
More of a visual learner?
WATCH THE VIDEO BELOW.
Grab my free 3 day video email course: FINDING YOUR BRAND COLOURS
Do you want to learn how to add a custom Heading font to your Squarespace website? Let’s get started so you can play around with fonts and your creativity!
Accessing the custom CSS
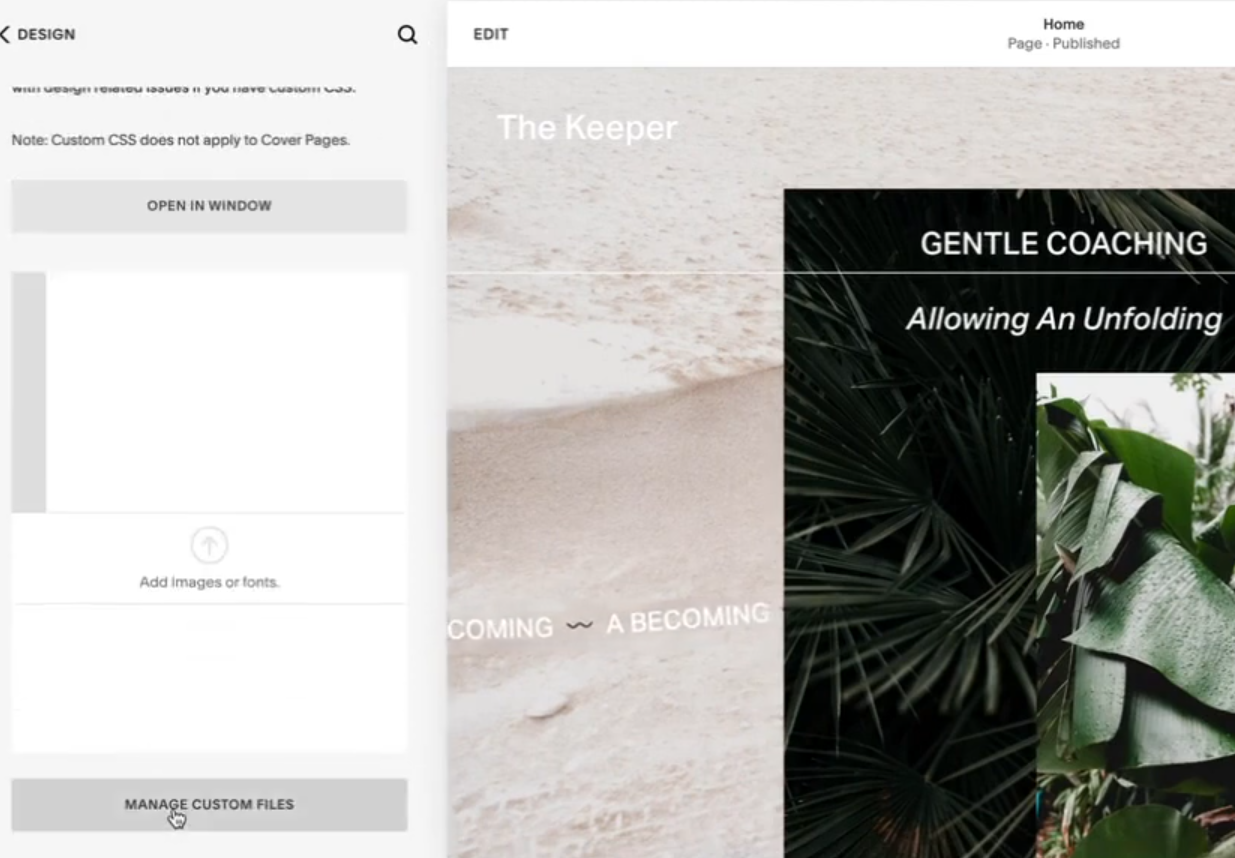
Head into the edit mode for your website and click on Design > Custom CSS.
Scroll down to find ‘Manage Custom Files’ which once you click on it will then allow you the option to click ‘Add images or fonts’.
Uploading your font
This will open up a window to locate the folder where you have downloaded your font to your computer. This needs to be a TTF file (which stands for TrueType font).
You can download your font from any site such as creative market, google fonts or apple fonts and these can be free or paid fonts.
Editing the custom CSS
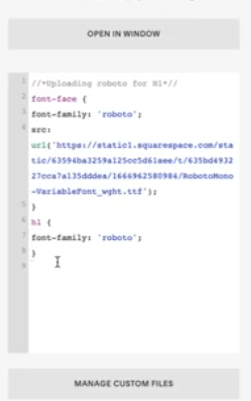
Once your font is uploaded into sqaurespace, in the same navigation pane scroll up to where there is a box to add your custom CSS code (as pictured to the right).
Creating a header description
We are going to create a descriptive header in the code to make it easier for less experienced coders to read what the code is for.
We need to tell the code that the descriptor we are writing isn’t part of the code. To do that you need to type your description between : //* *//

So for example, I have written //*uploading roboto for h1*//. Then press enter on your keyboard to take you down to the next line
Naming and placing font code
1) Copy and paste the following into line 2 of your code. It will paste across line 2 - 5.
font-face {
font-family: 'NAME';
src: url('FONT URL');
}
2) Edit the NAME to a one word name of your font
3) Delete FONT URL and leave your cursor sitting between the two apostrophes i.e. ( ' | ')
4) Scroll down to manage custom files’ and click on is to bring up your font and click on the URL of your uploaded font. This will insert the font into your code where your cursor is.
Assigning Font Code
5) Press return on your keyboard to go to the next line. In this next bit of code we are going to assign the font to where we want to use it. In this case, we are going to assign it to header 1.
6) Copy and paste the following into line 6 of your code. It will paste across line 6-8.
This is how the CSS code should look following the given example
h1 {
font-family: 'NAME';
}
7) Replace NAME with the exact same font name you gave to it previously. Note that capitalisation is considered and the code will not read the font if for example you have named your font ‘roboto’ and ‘Roboto’.
8) Click save in the top left hand corner of the editing pane
You can now see your new Header 1 font reflected in the website preview page wherever you have used Header 1!
If you now want to custom edit your paragraph fonts, click here.
The custom CSS code
The below is a copy and paste summary of the code from the previous steps.
Adding a description:
//*h1 font reboto*//
Naming and placing font code:
font-face {
font-family: 'NAME';
src: url('FONT URL');
}
Assigning it:
h1 {
font-family: 'NAME';
}

Amy Ilic
Squarespace Designer & Brand Conjuror